
330 Ton Clearing Niagara Chief, Straight Side Mechanical Press
ConditionUsed
1 available
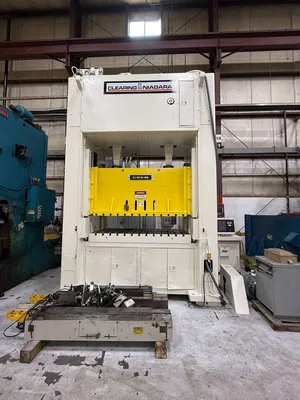
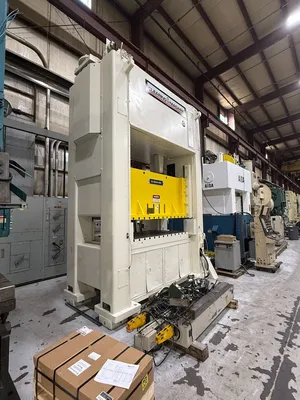

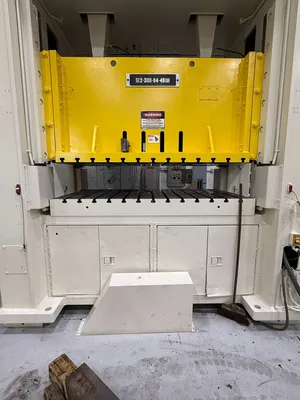


330 US Ton Clearing Niagara Mechanical Press 84" x 48" Bed Area, 8" Stroke, 32" Shut Height, 11" Adjustment, 35-70 SPM
I. Slide Assembly
A. Remove from press, and completely disassemble.
B. Check adjustment screws and nuts to make sure everything is in good working order. Cleaned up and tested to make sure that there isn’t any excess clearance.
C. Checked adjustment screw housings and adjustment assemblies, that all are in good working order. Clean and Chase all threads to make sure that they are in good working order.
D. Removed Overload assemblies, and replaced all seals and packings in Overloads. Checked Piston and polished to make sure that a proper seal is maintained in the overloads.
E. Check Overload Pump and valve and make sure in good operating condition. Rebuild valve if necessary, and replace Overload pump if necessary (will advise).
F. Skim cut bottom of slide face to make sure parallelism is attained.
II. Bolster Plate
A. Removed bolster plate and skim cut top and bottom to parallel.
III. Gibbs/Ways
A. Replaced all Micarta wear plates on slide assembly with new liners
B. Machined front and back gibbs to parallel.
C. Reinstalled back into press and made sure all adjustment mechanisms are working correctly.
IV. Counterbalance Assemblies
A. Disassembled and polished rods and pistons and cleaned out cylinder to make sure that everything is properly moving without and burrs/friction.
B. Replaced all seals, packings, and guide bushings.
C. Reassembled and benched test to make sure that there is no leaks.
V. Includes replacement of wrist pin bushings (2), and connection Arm Bushings (2).
VI. Lubrication and Air System
A. Tested all Lubrication Blocks, to make sure everything is clean and in good working order. Replaced any cinked or damaged lubrication Lines.
B. Tested Lube motor and pump and made sure it was properly cycling lube through the system.
C. Checked and replaced any air filters and regulators that were found to be questionable.
D. Made sure that the press was receiving proper air pressure throughout
entire system.
VII. Clutch/Brake Assembly
A. Disassemble and check condition of all clutch and brake plates and advise.
B. Have all clutch/brake plates skim cut to clean up.
C. Replace all liners for clutch/brake assembly
D. Replace all packings and seals.
E. Test springs; if they show any sign of wear, replace with new.
F. Reassemble all components and test for leaks.
VIII. Thoroughly sanded and prepped press to be painted.
A. Will be painting press the specific color that Rosco Incorporated requests, once all rebuild work is to be completed.
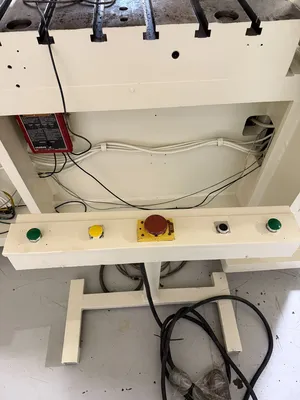
IX. Electrical Work to be Performed
A. Go Controls will go through entire control and test and confirm that everything in the control console is properly wired and in good working condition.
B. They will rewire control console to the press, and insure that all die blocks, limit switches, Dual Ross Air Valve, etc., are in good working order.
C. Once mechanical recondition is complete, they will test all functions of the press, in Inch/Single/Continuous Mode, and all control features will be reprogrammed, so that everything is functioning properly.
X. Final Runoff will be performed
A. Rygate LLC will test run for 3-4 days prior to final runoff, to make sure all electrical is working properly, and all mechanical components are in good working order.
Capacity: 330 US Tons
Model Number: SE2-300-84-48UH
Serial Number: P54252
Year of Manufacture: 1996
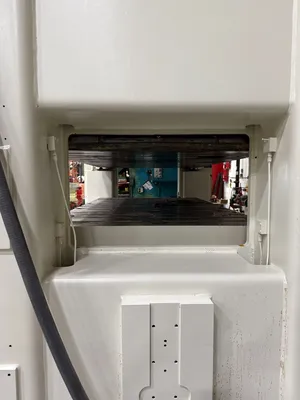
Bed Area: 84” x 48”
Slide Area: 84” x 48”
Stroke: 8”
Adjustment: 11”
Shut Height: 32” over bed SDAU
Strokes per Minute: 35-70
Windows: 30 3/4” wide
Bolster Plate: 7” thick T-Slotted
Overall Height: 15’ approx. to top of press frame
16’7” floor to top of clutch cover (highest point)
Floor to top of Bolster Dimension: 47”
Note: This does not include a set of vibration isolation levelers ( will add 7” of height)
Hauling Dimensions: 135” wide x 199” long x 82” tall
Overall Weight: 76,000 lbs
Footprint Dimensions: 123.25” LR x 69” FB
Floor Standing
Air Clutch and Brake Assembly
Air Counterbalances
T-Slotted Ram and Bolster
Trabon Recirculating Lubrication System
Free Standing Press Control
Wintriss Smart Pac 2 Control
Link 501 Press Control
Main Motor: 40 HP @ 1775 RPM
Knockouts in Slide
8 Point Gibbing
Single/Inch/Continuous
Motors and Controls
We use cookies to improve your experience. Privacy Policy.